

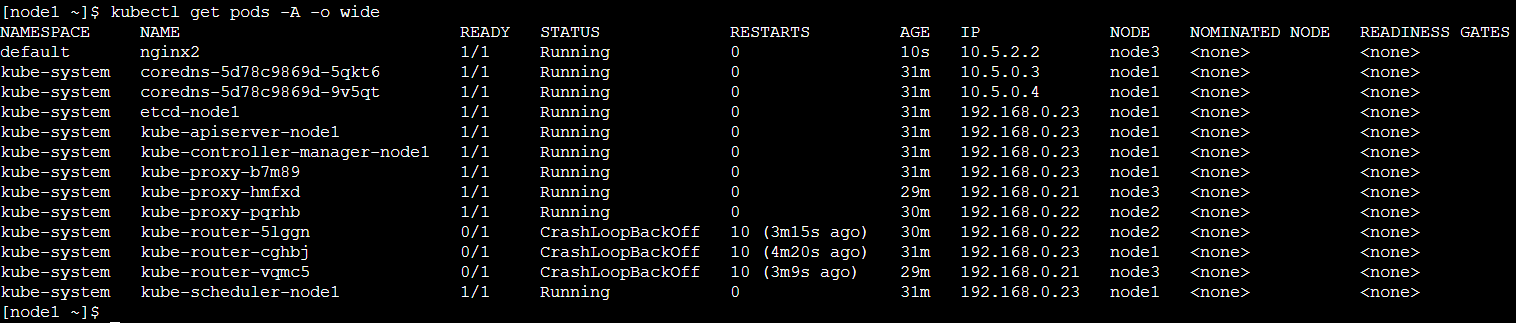
kubectl get pods
kubectl get pods -A : 모든 네임스페이스
kubectl get pods -o wide : 자세히 보기
kubectl delete pod nginx2 : nginx2 pod 삭제
pod 생성시 네임스페이스 설정을 하지 않으면 default 네임스페이스에서 pod가 만들어진다.
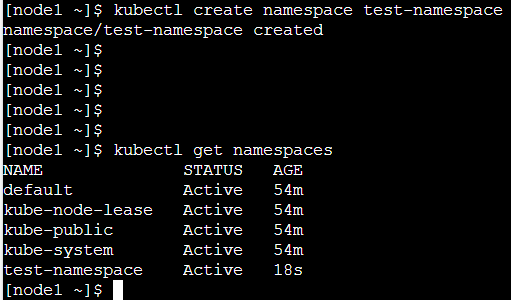
네임스페이스 생성 : kubectl create namespace test-namespace
네임스페이스 조회 : kubectl get namespaces
네임스페이스의 pod 조회 : kubectl get pods -n my-namespace
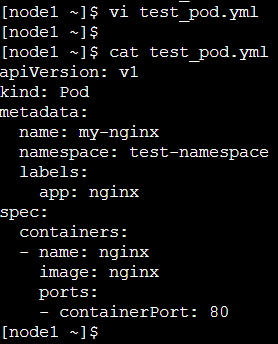
스크립트를 통한 Pod 생성(kind: Pod)
// kubectl run my-nginx --image=nginx --port=80 //생성예시
apiVersion: v1
kind: Pod
metadata:
name: my-nginx
namespace: test-namespace # 네임스페이스 지정시, 여기에 지정
labels:
app: nginx
spec:
containers:
- name: nginx
image: nginx
ports:
- containerPort: 80
스크립트 생성
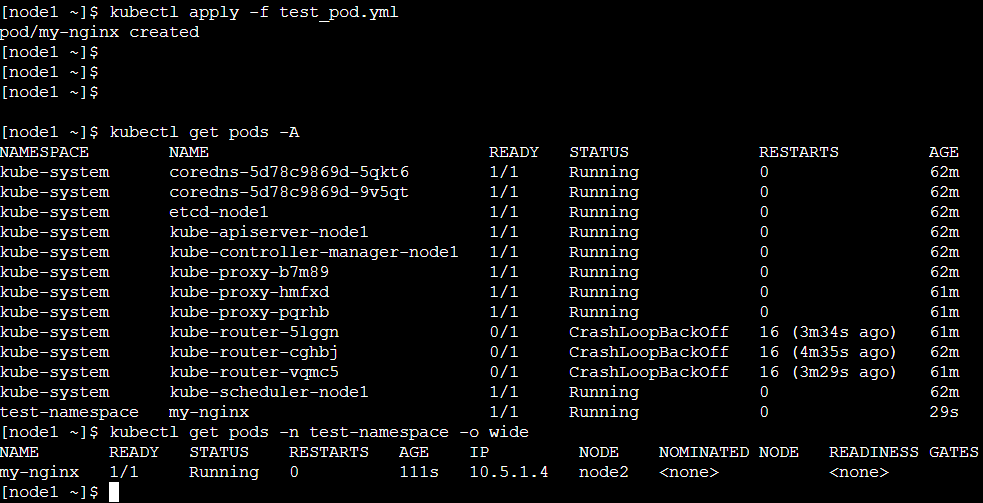
스크립트 적용 : kubectl apply -f test_pod.yml
전체 pod 조회 : kubectl get pods -A
test-namespace pod 조회 : kubectl get pods -n test-namespace -o wide
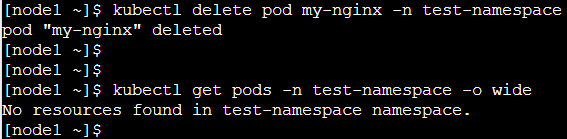
pod 삭제
기본 default namespace를 바라보고있기 때문에 옵션에 삭제할 pod의 namespace를 추가해주어야한다
kubectl delete pod my-nginx -n test-namespace
pod를 하나씩 삭제하면 생기는 문제
스크립트에서 kind: Deployment = 여러개의 pod가 한번에 생성되는데 생성된 pod들을 하나씩 삭제해야한다.
= kubectl delete -f test_pod.yml 명령으로 삭제하기
해당 스크립트를 확인해서 pod들을 모두 지움
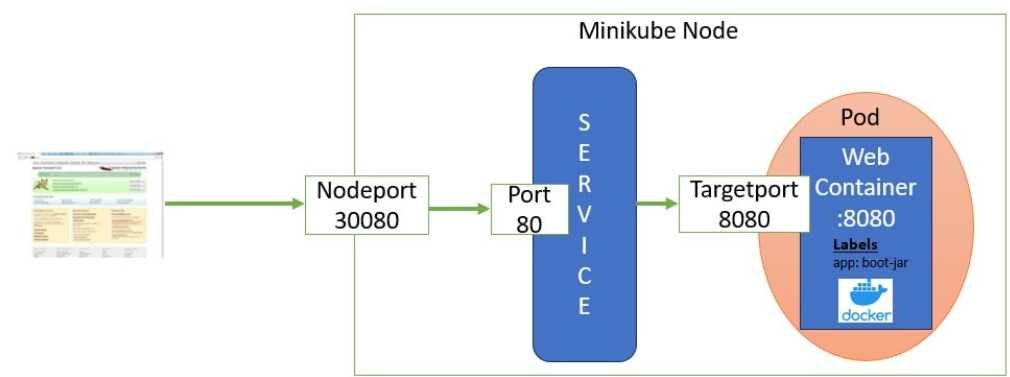
Service 세팅 및 nginx pod 동작 테스트(kind:Service)
port를 열어줘야하는데 그 역할을 kind:service가 한다.
service 파일 생성해야한다.
test_service.yml 파일 생성
apiVersion: v1
kind: Service
metadata:
name: nginx-service
spec:
type: NodePort (NodePort, LoadBalancer, Cluster)
ports:
- port: 80
targetPort: 80
nodePort: 30007 => curl ip:nodeport
selector:
app: my-nginx // kind: Pod의 label과 이름을 맞추어 주어야한다.
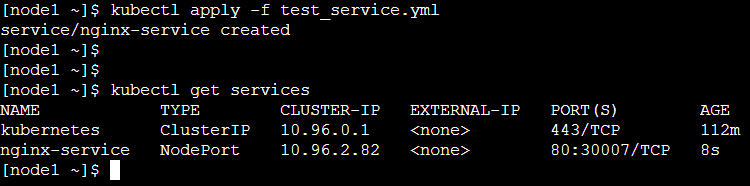
적용 및 PORT확인
kubectl apply -f test_service.yml
kubectl get services
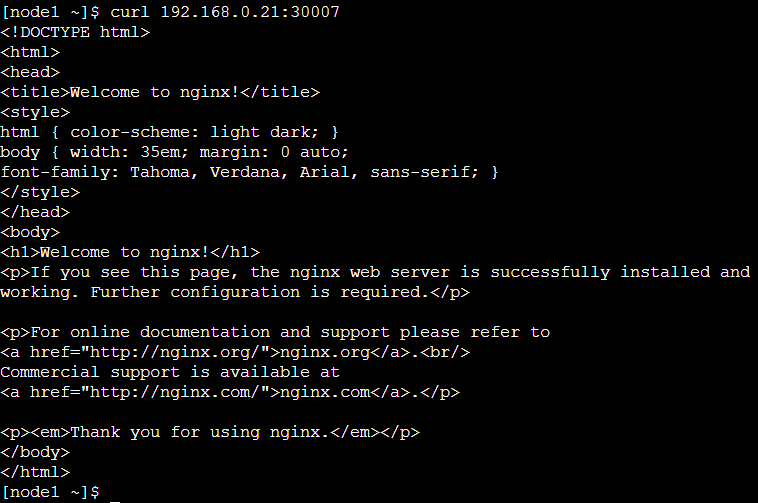
nginx node3에서 동작 확인

node3 IP 확인

nginx 호출 : curl 192.168.0.21:30007
Welcome to nginx!
⭐Deployment(depl) 세팅 (kind:Deployment )
Deployment를 통해 pod 생성
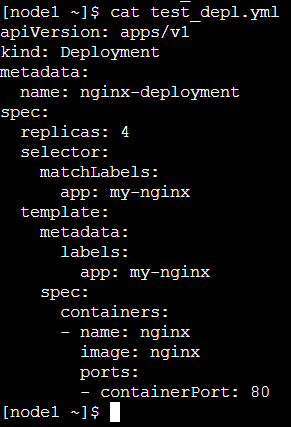
test_depl.yml 생성
apiVersion: apps/v1
kind: Deployment
metadata:
name: nginx-deployment
spec:
replicas: 2
selector:
matchLabels:
app: my-nginx //밑에 labels: app: 이랑 매칭됌
template:
metadata:
labels:
app: my-nginx //service에 selector: app: 매칭됌
spec:
containers:
- name: nginx
image: nginx
ports:
- containerPort: 80
test_depl.yml 파일 생성 및 deployment 확인 및 pod 확인
kubectl apply -f test_depl.yml
kubectl get deployment
kubectl get pods -A

service 실행
kubectl apply -f test_service.yml
kubectl get pods -o wide
node3, node2에서 동작 확인

node3, node2 IP 확인

node3 nginx 호출 정상 확인

node2 nginx 호출 정상 확인

추가
test_depl.yml 파일 replicas: 4로 변경
deployment 실행
kubectl apply -f test_depl.yml

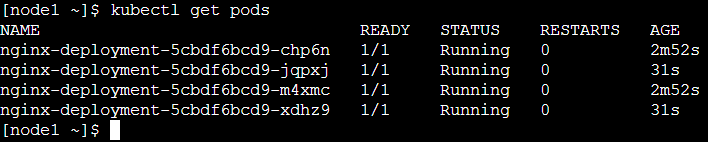
pod 4개 생성 확인
kubectl get pods
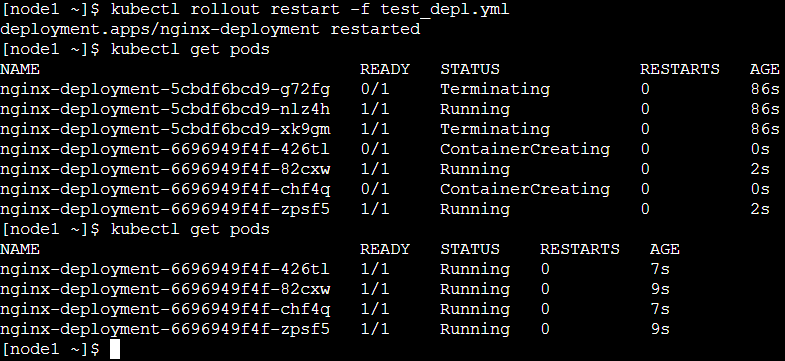
rollout 배포(무중단 배포)
kubectl rollout restart -f test_depl.yml
재시작할 때 기존에 있던 서버들이 죽기전에 미리 서버들을 만들어 놓아서 서비스가 끊기지 않도록 하는 방법
단점 : 실시간으로 사용자 경험이 달라질 수 있다.
무중단 배포가 무조건 좋다고만은 할 수 없다.
ReplicaSet 세팅 (kind:ReplicaSet )
ReplicaSet는 지정된 수의 파드 복제본이 항상 실행되도록 보장해주는 k8s의 리소스
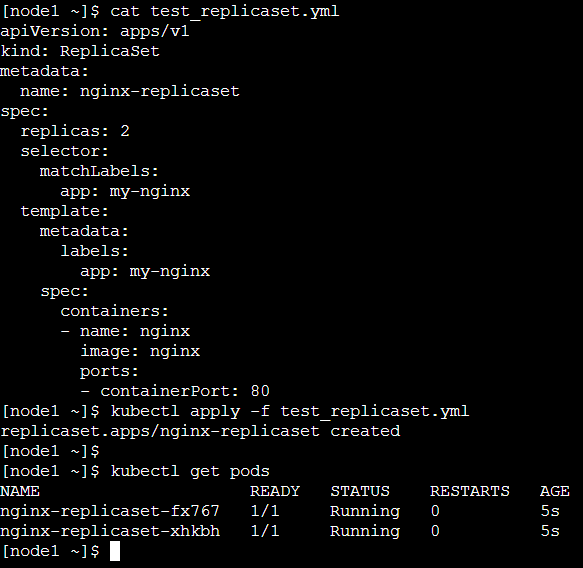
test_replicaset.yml 파일 생성
apiVersion: apps/v1
kind: ReplicaSet
metadata:
name: nginx-replicaset
spec:
replicas: 2
selector:
matchLabels:
app: my-nginx
template:
metadata:
labels:
app: my-nginx
spec:
containers:
- name: nginx
image: nginx
ports:
- containerPort: 80
test_replicaset.yml 파일 생성 및 적용
kubectl apply -f test_replicaset.yml
kubectl get pods
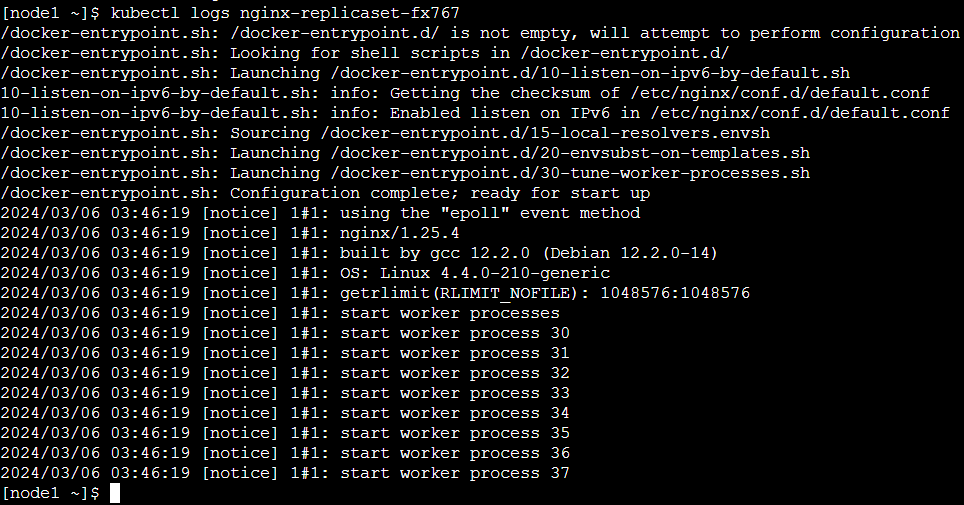
pod log 확인
kubectl get pods : 파드명 검색
kubectl logs 파드명 : 컨테이너 로그 출력
'Cloud > AWS' 카테고리의 다른 글
| Kubernetes4_2024_03_07 (0) | 2024.03.11 |
|---|---|
| Kubernetes3_2024_03_06 (2) | 2024.03.06 |
| Kubernetes1_2024_03_05 (0) | 2024.03.05 |
| Docker3_2024_03_05 (0) | 2024.03.05 |
| Docker2_2024_03_04 (1) | 2024.03.05 |